Scene Recognition with Deep Learning
Table of Contents
Scene Recognition with Deep Learning
Overview
In this project, I design and train deep convolutional networks for scene recognition.
Dataset
The dataset to be used in this assignment is the 15-scene dataset, containing natural images in 15 possible scenarios like bedrooms and coasts. It was first introduced by Lazebnik et al, 2006. 
SimpleNet
For this part, I made a simple convolutional neural net from scratch. 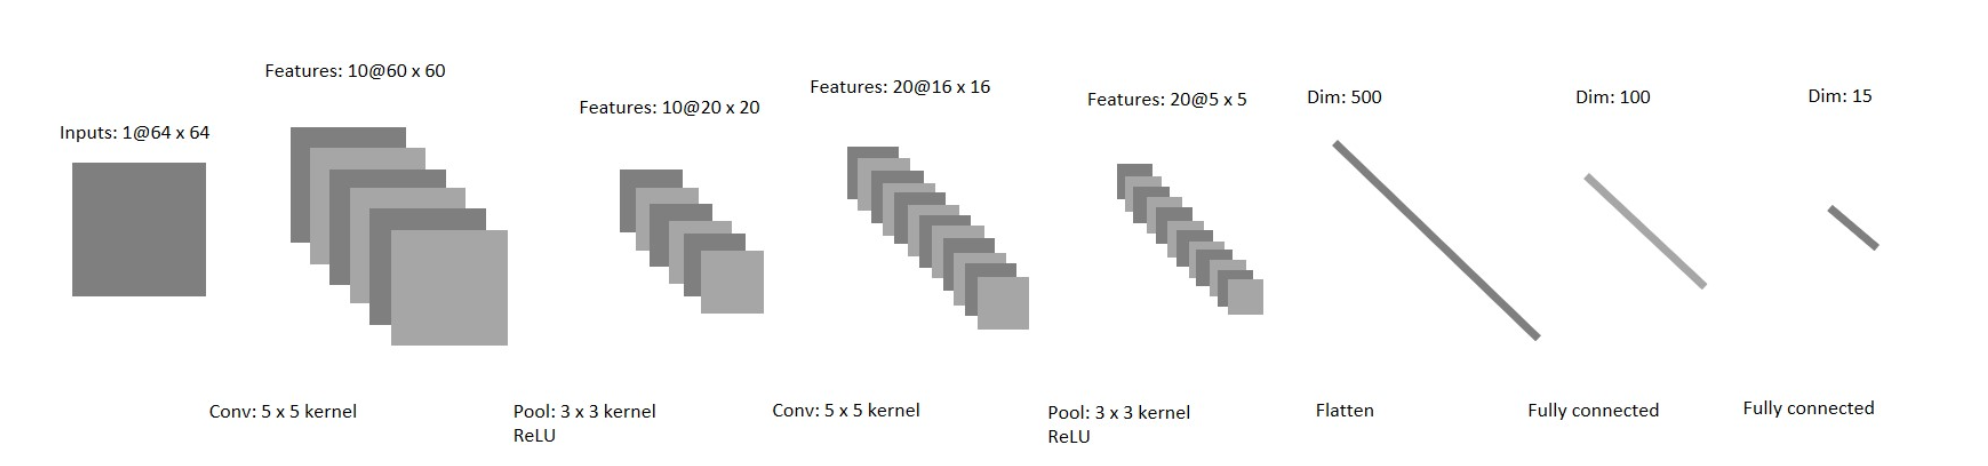
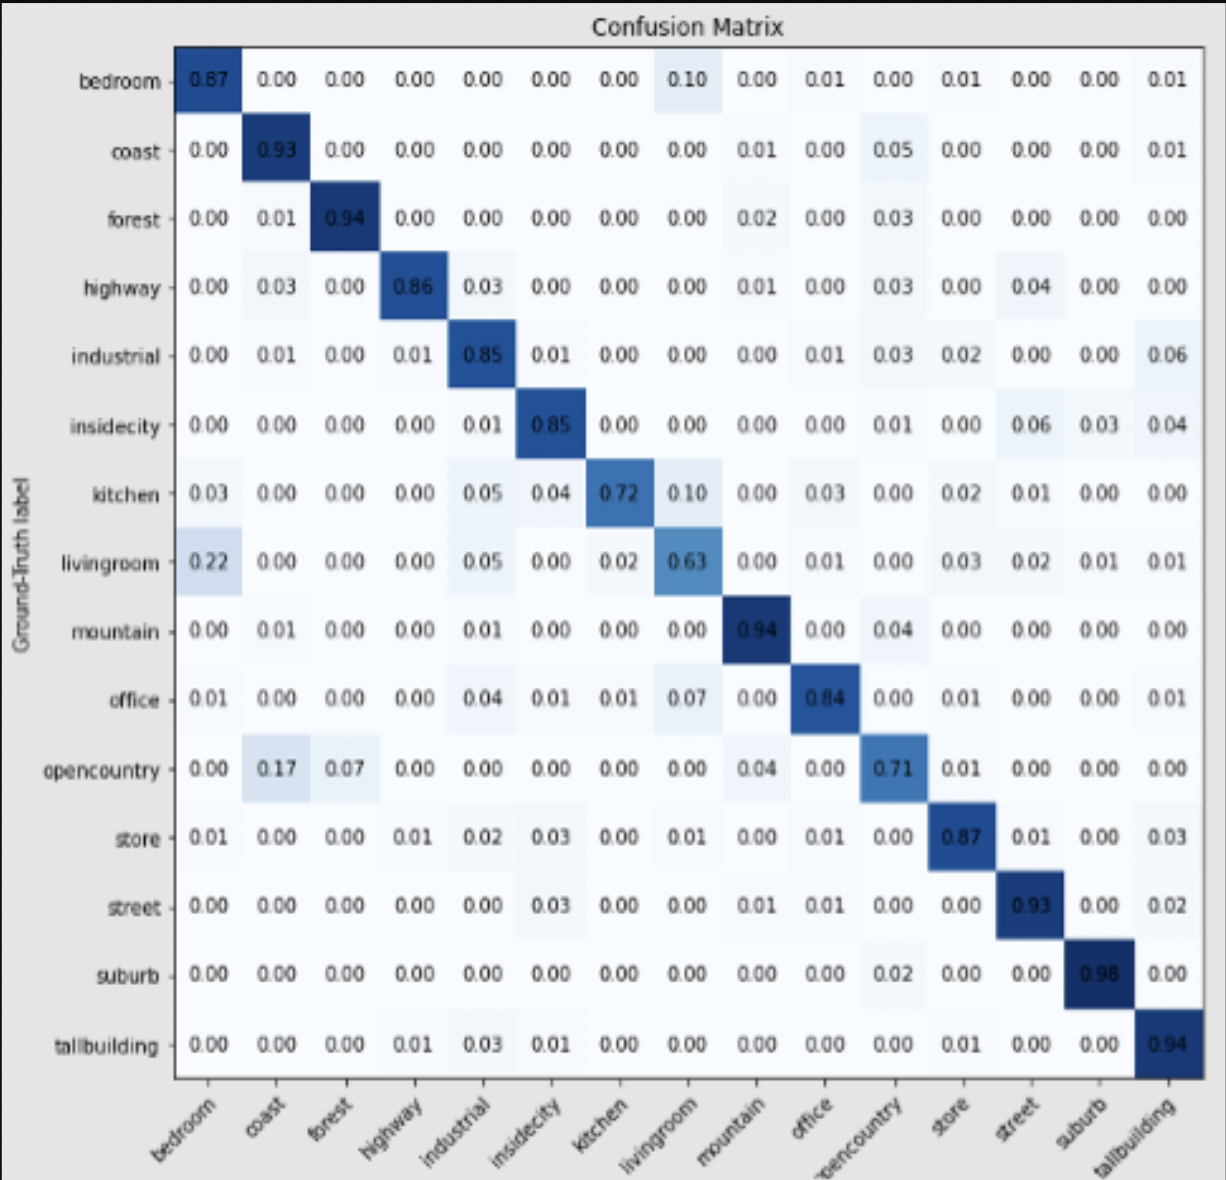
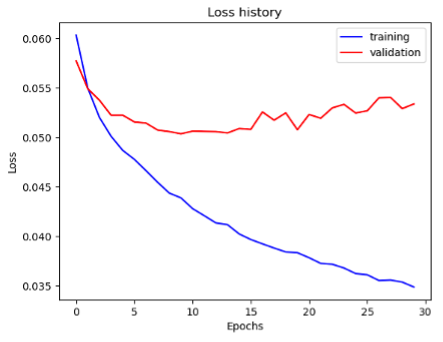
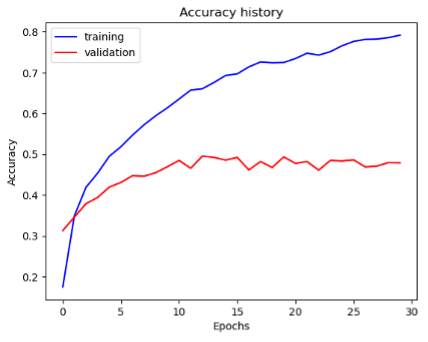
The final accuracy is below, with the Final training accuracy: 0.7916247906197655 and Final validation accuracy: 0.4786666666666667
SimpleNetFinal
For this part, I tried five different ways to improve the accuray of the SimpleNet that I made in the part 1.
Jittering, Image Augmentation
In this task, scene recognition, I could do some transformation on the image to increase my dataset size. One I used is the RandomHorizontalFlip, since if you mirror a living room is still a living room. However, this technique may not work on other tasks. For example, the letter regonition, if you mirror flip a letter “b”, it will become a letter “d”.
Another transformation I used is ColorJitter to randomly change the brightness, contrast, saturation and hue of an image.
Zero-Centering & Variance-Normalization
One simple thing can help a lot is to normalize the images by subtracting their mean and then dividing by their standard deviation. Therefore, I first implement the compute_mean_and_variance and utilized transforms.Normalize to pre-processing my data
Dropout Regularization
The dropout regularization randomly turns off network connections at training time to fight overfitting.
Making Network “Deep”
The SimpleNet is not deep enough, for this step, I added additional convolutional layers
Batch normalization
For the step, I add a batch normalization layer after each convolutional layer (except for the last)
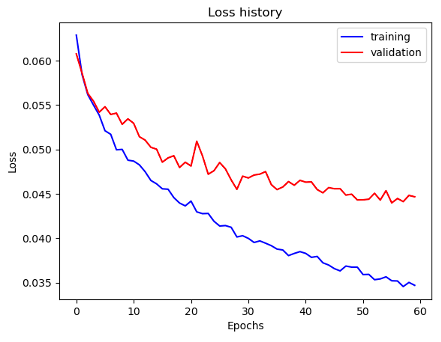
Result
Implementing the steps above, I made the the following result - Final training accuracy: 0.7135678391959799 and Final validation accuracy: 0.5533333333333333 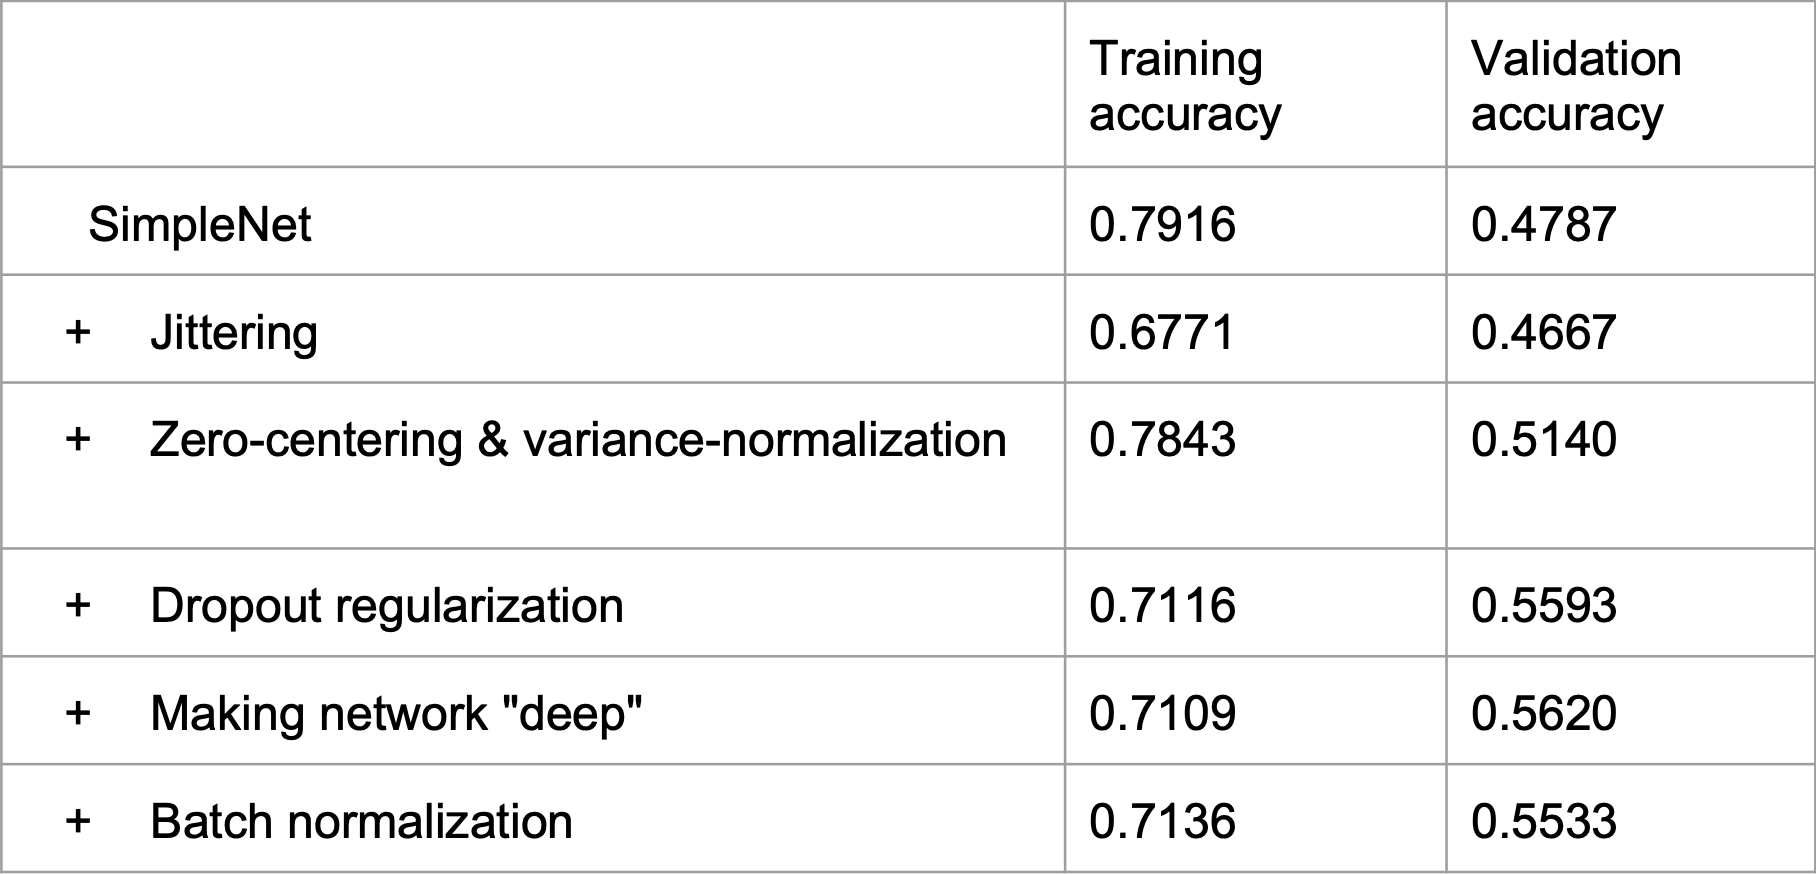

ResNet
ResNet18
For this taks, I used the ResNet18. Firstly, loaded ResNet18, Then retrieve some layers from the pre-trained model and concatenate them with our own custom layers. Remove the last Linear layer, and replace it with a proper layer which could output the scores for 15 classes.
Fine-tuning ResNet
For now, we have done is merely defining the final layer with the correct dimensions, but the weights of the layer are just some random values and it won’t be able to produce the desired scores. For the training, I freeze the conv layers and some of the linear layers from a pre-trained since we want to do the transfer learning. Thus, we only want to train the weight for the last few layers.